In step 6 of this tutorial, the changes that can be done to the text nodes are undoable and redoable.
For the source of this tutorial step see
github - gef4.mvc.tutorial6.
Note: parts of this tutorial are copied from other examples or from forum postings.
At the moment there are 2 kind of changes that can be done to TextNodes.
1. Drag the node and change its location.
2. Edit the text
To be able to make use of the undo/redo mechanism that Eclipse implements.
To read more about this, you can start here:
Every action that applies a change that shall be undoable, must be represented by an implementation of IUndoableOperation.
Example is the text change.
Before it looked like this, just changing the text in the editModeEnd().
getContent().setText(newText);
Now an operation is needed, that look like this:
public
class
ChangeTextNodeTextOperation extends
AbstractOperation implements
ITransactionalOperation {
TextNodePart
part;
private
String oldText;
private
String newText;
public
ChangeTextNodeTextOperation(TextNodePart part,
String oldText,
String newText
) {
super(
"Change Text in TextNode"
);
this.part
= part;
this.oldText
= oldText;
this.newText
= newText;
}
@Override
public
IStatus execute(IProgressMonitor monitor,
IAdaptable info)
throws
ExecutionException {
part.getContent().setText(newText);
return
Status.OK_STATUS;
}
@Override
public
IStatus redo(IProgressMonitor monitor,
IAdaptable info)
throws
ExecutionException {
execute(monitor,
info);
return
Status.OK_STATUS;
}
@Override
public
IStatus undo(IProgressMonitor monitor,
IAdaptable info)
throws
ExecutionException {
part.getContent().setText(oldText);
return
Status.OK_STATUS;
}
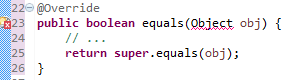
@Override
public
boolean
isNoOp() {
return
oldText.equals(newText);
}
}
1. Get all information at creation time, because several operation might be executed, it is not reliable in which state the other objects are at that time.
2. Store as well the old state, so you can implement the undo.
3. If possible implement the redo with delegating to execute
4. Implement the isNoOp, so the operation with no effect are sorted out of the undo history.
To execute this operation you code like this:
getViewer().getDomain().execute(
new ChangeTextNodeTextOperation(this, getContent().getText(), newText));
The Viewer has a reference to the domain.
The domain's execute() method, delegates to the operation history.
In case of working in a Eclipse plugin, the operation history is bound to the one from Eclipse, org.eclipse.gef4.mvc.ui.MvcUiModule. If you want to bind your own, you can overwrite the bindIOperationHistory in the Guice module.
The same pattern is applied to implement the ChangeTextNodePositionOperation.
Keyboard shortcuts
To have the keyboard shortcuts work for undo Ctrl-Z and redo Ctrl-Y, again a Policy is installed. But on which object. The keyboard input is send to the part which is selected, or the RootPart.
Guice can be used to add the policy to all TextNodeParts and the RootPart, but using only a single instance.
binder()
.bind(GlobalOnTypePolicy.class
)
.in(Scopes.SINGLETON);
Configure the RootPartAdapters:
@Override
protected
void
bindAbstractRootPartAdapters(MapBinder<AdapterKey<?>,
Object> adapterMapBinder)
{
super.bindAbstractRootPartAdapters(adapterMapBinder);
adapterMapBinder
.addBinding(
AdapterKey.get(
FXTypeTool.TOOL_POLICY_KEY,
"GlobalOnTypePolicy"))
.to(
GlobalOnTypePolicy.class);
}
And then add the same mapping to the TextNodePart adapters.